Guide | Bitaxe Setup | 10 min read
Setting up the Bitaxe Gamma: wifi and pool setup in 8 steps
June 2026By Mario
In short: Setting up the Bitaxe Gamma takes 10 to 15 minutes: plug it in, connect to the Bitaxe access point, enter your 2.4 GHz Wi-Fi settings in AxeOS, look up the new IP address, set up the pool and worker, check the hashrate and temperature, and verify the firmware. The Gamma runs on Bitmain’s BM1370 chip and delivers around 1.1 TH/s at approximately 18 watts.
Setting Up Bitaxe Gamma: Complete Wi-Fi and Pool Setup
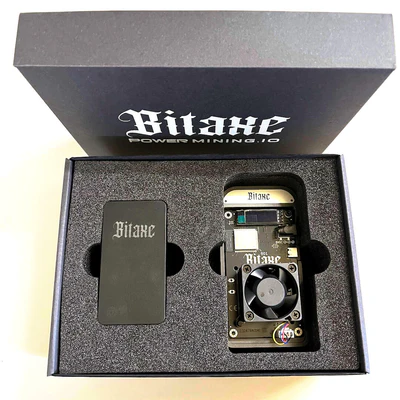
You can set up the Bitaxe Gamma in 10 to 15 minutes: connect to Wi-Fi, configure the pool, and see your first GH/s go live. This open-source bitcoin mining project runs on Bitmain’s BM1370 chip and uses AxeOS, a web interface that runs on the device itself.
Setting the Bitaxe Gamma: Preparation
Make sure you have this ready before you begin:
- Bitaxe Gamma (with power adapter)
- Wi-Fi network on 2.4 GHz (not 5 GHz)
- Computer, tablet, or smartphone with a browser
- IP scanner like Fing (useful if you lose the IP address)
Step 1: Setting up the Bitaxe Gamma starts here: Connect and power on

Connect the power adapter to the Bitaxe Gamma and plug it into an outlet.
The device starts up immediately. Wait 30 to 60 seconds. During the very first startup, the miner sets itself as a Wi-Fi access point. You will see a network named bitaxe or AxeOS appear in your Wi-Fi list.
Step 2: Connect to the access point
Click on the bitaxe-network. No password required.
Open your browser and go to 192.168.4.1. You see the AxeOS web interface: the control panel of your miner. From here, you manage everything.
Step 3: Set up Wi-Fi in AxeOS
In AxeOS, go to the tab Settings.
Fill in:
- SSIDname of your Wi-Fi network
- Password: your Wi-Fi password
Click Save and then Reboot. The Bitaxe Gamma will restart and will now connect to your own network. The access point connection will be automatically disconnected.
Step 4: Look up new IP address
After the restart, your router assigned a new IP address to the Bitaxe Gamma.
Look it up via:
- The device list in your router interface
- An IP scanner (Fing works well on mobile)
- The OLED display on the miner itself (if your model has one)
Type that IP address into your browser. You are back in AxeOS.
Step 5: Setting up the mining pool

Now the pool.
Go to Settings Okay Mining in AxeOS. Choose your pool and enter the stratum address:
Public Pool (solo mining, popular among Bitaxe users):- Stratum URL:
stratum+tcp://public-pool.io - Port:
21496 - Username: your bitcoin receiving address
- Stratum URL:
stratum+tcp://mine.ocean.xyz - Port:
3334 - Username: your bitcoin address
- Stratum URL:
stratum+tcp://stratum.braiins.com - Port:
3333 - Username: your account username
Step 6: Set worker name and save
Optionally add a worker name. Format: streetname.employeename. Handy for when you have multiple miners later.
Click Save and then Reboot.
Step 7: Check hashrate and temperature
After 2 to 3 minutes you see the hashrate climb in AxeOS. The Bitaxe Gamma averages 1.0 to 1.4 TH/s, depending on firmware and cooling.
Check also:
- Temperaturemust remain below 70 degrees Celsius
- Accepted sharesconfirms that the pool acknowledges your contribution
Do you see accepted shares coming in? Then everything is working correctly.
Step 8: Check firmware
Check the active firmware version in AxeOS and compare it with the latest release on the official AxeOS GitHub page. Outdated? Update via OTA Update in the settings menu.
Done: Setting up the Bitaxe Gamma is complete
Want more hashrate? Then check out the Bitaxe Supra.
Setting the Bitaxe Gamma: Advanced AxeOS Settings
You've finished configuring the Bitaxe Gamma, and it's up and running. But AxeOS offers more than just the basic settings. Here are the settings that make the biggest difference in performance and reliability.
Adjust voltage and frequency
By default, the Bitaxe Gamma operates at the factory settings for voltage and frequency. In the AxeOS settings under Settings > Mining find options to adjust this:
- Core Voltagestandard around 1150-1200 mV. Lower voltage = lower power consumption but also less hashrate.
- Core Frequency: standard around 490-550 MHz. Higher = more hashrate but also more heat.
Safe rule of thumb: leave the factory settings as they are until you have the miner running stably for a few days. Make sure the temperature always stays below 75 degrees Celsius.
ASIC autotune
AxeOS supports automatic tuning via the Autotune-function. This automatically calibrates voltage and frequency for the optimal combination of hashrate and temperature. Turn it on via Settings > Advanced.
Bitaxe Setting the Gamma: What Is Solo Mining, and When Should You Choose It?
The Bitaxe Gamma is not a professional mining machine. It reaches about 1.1 TH/s. For comparison: a modern Antminer S21 reaches 200+ TH/s. That is about 180 times more.
So why set the Bitaxe Gamma for solo mining?
- EducationalYou understand how mining works because you run it yourself.
- Ideologicalyou are contributing to the decentralization of the network.
- Lottery ticketPublic Pool gives you a small chance at a full block of 3.125 BTC. Small, but not zero.
- Power consumption: The Bitaxe Gamma consumes about 15 to 20 watts. This is negligible in terms of the energy bill.
Do you really want to mine seriously? If so, the Bitaxe Gamma isn't the right device for you. But that's not what it's meant for anyway. Setting up the Bitaxe Gamma is a project, not a business plan.
Setting the Bitaxe Gamma: Understanding the Connection to the Pool
Once you have finished configuring the Bitaxe Gamma and are connected to a pool, the miner submits work via the Stratum protocol. The pool divides the computational work into small pieces (shares) that the miner submits.
Accepted shares means: the pool has verified and accepted your calculation.
Rejected shares are not a disaster, but a high ratio is a sign that something is wrong with the connection or settings.
With solo mining via Public Pool, every accepted share is proof that you are contributing to the network. Finding a block is unlikely, but the miner is doing its job.
Setting the Bitaxe Gamma: Energy and Costs
Math problem for the pragmatic thinker:
- Power consumption: ~15 watts
- Per day: 0.015 kWh x 24 = 0.36 kWh
- Per month: 0.36 x 30 = ~10.8 kWh
- At 30 cents per kWh: ~3.25 euros per month
For just a few euros a month, you get a miner that runs constantly, is educational, and gives you a small chance of mining a bitcoin block. That’s the trade-off for most people who set up the Bitaxe Gamma.
Setting the Bitaxe Gamma: The Open-Source Aspect
The Bitaxe project is completely open-source, both hardware and software. The schematics are on GitHub. The firmware is on GitHub. Anyone can build it, improve it, and continue developing it.
In practice, the community actively contributes firmware updates, bug fixes and new features. AxeOS is updated regularly. Check the GitHub page for the latest releases. That is why the Bitaxe Gamma is popular with the technical Bitcoin community.
Setting Up the Bitaxe Gamma: From Out of the Box to a Running Miner, A Summary
To summarize the steps for setting up the Bitaxe Gamma:
- Connect to power, wait for access point
- Connect via 192.168.4.1, set up Wi-Fi in AxeOS
- Restart, look up new IP via router or Fing
- Configure pool: stratum URL, port, bitcoin address as worker
- Add worker name, save and restart
- After 2-3 minutes: check hashrate and accepted shares
- Verify firmware and update if necessary
- Check temperature: keep below 70 degrees Celsius
After configuring the Bitaxe Gamma, most devices will run stably without requiring further attention. Check the uptime and accepted shares once a week. That's all.
Troubleshooting: most common problems
Wi-Fi connection failed Check if your network is on 2.4 GHz. Are you hiding your SSID? Make it temporarily visible. Special characters in the password? Try a network without them. AxeOS unreachable after restart Give the miner 60 seconds. Use an IP scanner if you have lost the IP address. If necessary, assign a static IP address via your router. Hashrate is at zero Check the stratum address and port for typos. Check if the pool is online via the status page of the respective pool. Temperature above 70 degrees Provide better air circulation. An open space or a small USB fan next to the miner usually solves this. No accepted shares after 10 minutes Check your worker/username settings. The bitcoin address must be valid. Some pools require a specific format.Frequently Asked Questions About Setting Up Bitaxe Gamma
bitaxeopen Wi-Fi network 192.168.4.1 in the browser and configure your own Wi-Fi and mining pool via AxeOS. After a reboot, the miner is active.192.168.4.1 to the built-in access point. Then via the IP address that your router has assigned.On to your first hash
P.S. Stuck? Feel free to ask, and I will help you out.Setting the Bitaxe Gamma: Advanced Tips
With a bit of extra attention you get more out of your miner and keep it healthy for longer.
Adjust clock speed
In AxeOS, you can adjust the clock speed of the BM1370 chip. The default value is optimized for a balance between hashrate and temperature. If you want more hashrate, increase the clock speed. Keep an eye on the temperature: above 70 degrees is too hot.
Set up automatic restart
In AxeOS, set up an automatic reboot if the pool connection is lost for more than 10 minutes. This prevents the miner from sitting idle without you noticing.
Track results
Public Pool displays a dashboard for each bitcoin address. Bookmark the URL with your address. Here, you can see the submitted hashes and whether the network accepts them.
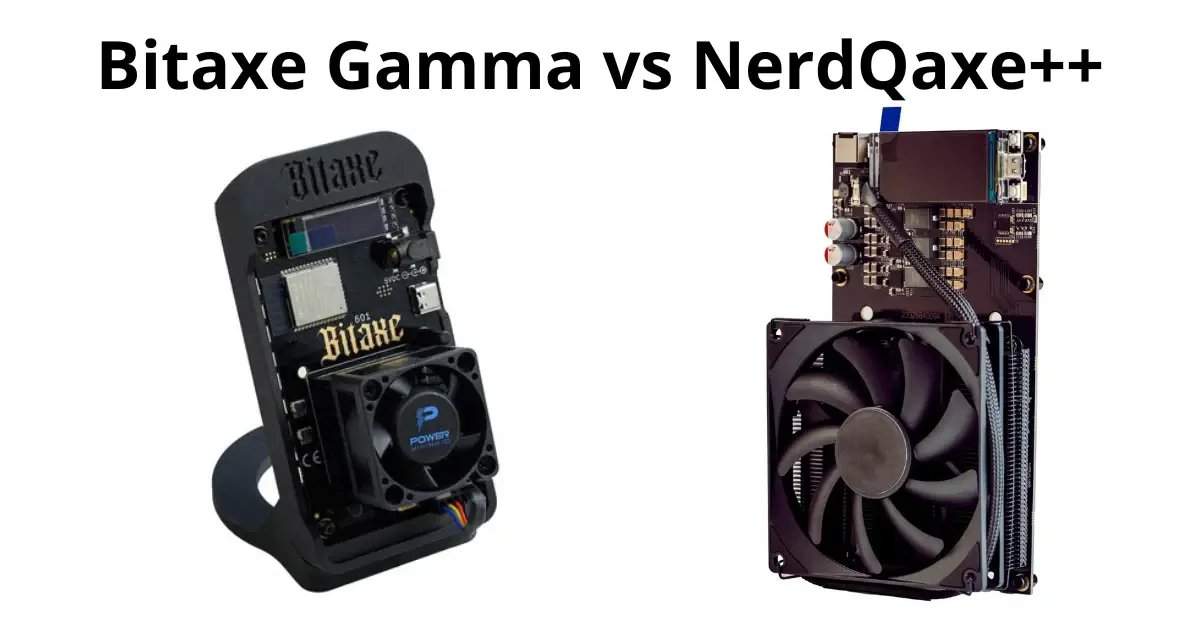
Did you successfully configure the Bitaxe Gamma and want more hashrate? Check out the Bitaxe Supra or the NerdQaxe++.
Setting the Bitaxe Gamma: Additional Frequently Asked Questions
Yes. All you need is a smartphone with a browser. Connect to the bitaxe Wi-Fi network, go to 192.168.4.1, and configure everything through the AxeOS web interface. You only need a computer if you want to update the firmware via OTA or the command line.
Virtually unlimited. Each device is assigned its own worker name. You can configure dozens of Bitaxe Gamma devices on the same pool and bitcoin address. The pool registers each worker separately.
AxeOS is the open-source web interface that runs on the Bitaxe Gamma itself. You can access it via a browser using the miner’s IP address. Through AxeOS, you can manage Wi-Fi settings, pool configuration, voltage, frequency, and OTA updates. The name refers to the Bitaxe fork of the ESP-Miner project.
No. The built-in ESP32 Wi-Fi chip only supports 2.4 GHz. If you only have 5 GHz available, you must set up a router or access point that also broadcasts 2.4 GHz. Virtually all modern routers support both.
No. The Bitaxe Gamma does not have an Ethernet port. It connects exclusively via Wi-Fi. Ethernet is available on some other Bitaxe models, but not on the standard Gamma.
Setting the Bitaxe Gamma: Your Next Step
After a few weeks of running you get a better feel for hashrate variation, temperature and stability. You also learn what the miner needs from its environment.
Would you like more after that? The Bitaxe Supra gets more hashrate. Or consider using multiple Bitaxe Gamma nodes: same setup, greater contribution to the network. Repeating the process of setting up Bitaxe Gamma is easy once you’ve done it once.
Mining bitcoin at home does not make a profit. You learn how mining works and you take part in the network yourself.
Do you have questions about setting up the Bitaxe Gamma, or are you having trouble with something? The community is active and helpful. Feel free to ask your question using the contact form on BitcoinStuffStore or search the Bitaxe community on GitHub and Telegram. You’re not the only one going through this process.
See also
Bitaxe Gamma, NerdQaxe++, Bitaxe Supra, BTClock Rev. B Frontlight.